Setup Guide
This guide walks you through the complete setup process to connect your Salesforce org with aprity. Follow the steps in order from start to finish.
Prerequisites
Before you begin, make sure you have:
- A Salesforce org (Production, Sandbox, or Developer Edition)
- System Administrator access
- An activation code provided by aprity (included in your welcome email)
Step 1: Install the package
Install the aprity managed package using the installation link provided by aprity (via email or your account manager).
During installation, Salesforce will ask you to grant access to third-party websites (api.aprity.ai and cdn.aprity.ai). Click Yes, grant access to proceed.
For detailed installation instructions, see Installing the Managed Package.
Step 2: Assign permission set
- Go to Setup > Permission Sets.
- Find "Aprity Admin" and click on it.
- Click Manage Assignments > Add Assignment.
- Select your user and click Assign.
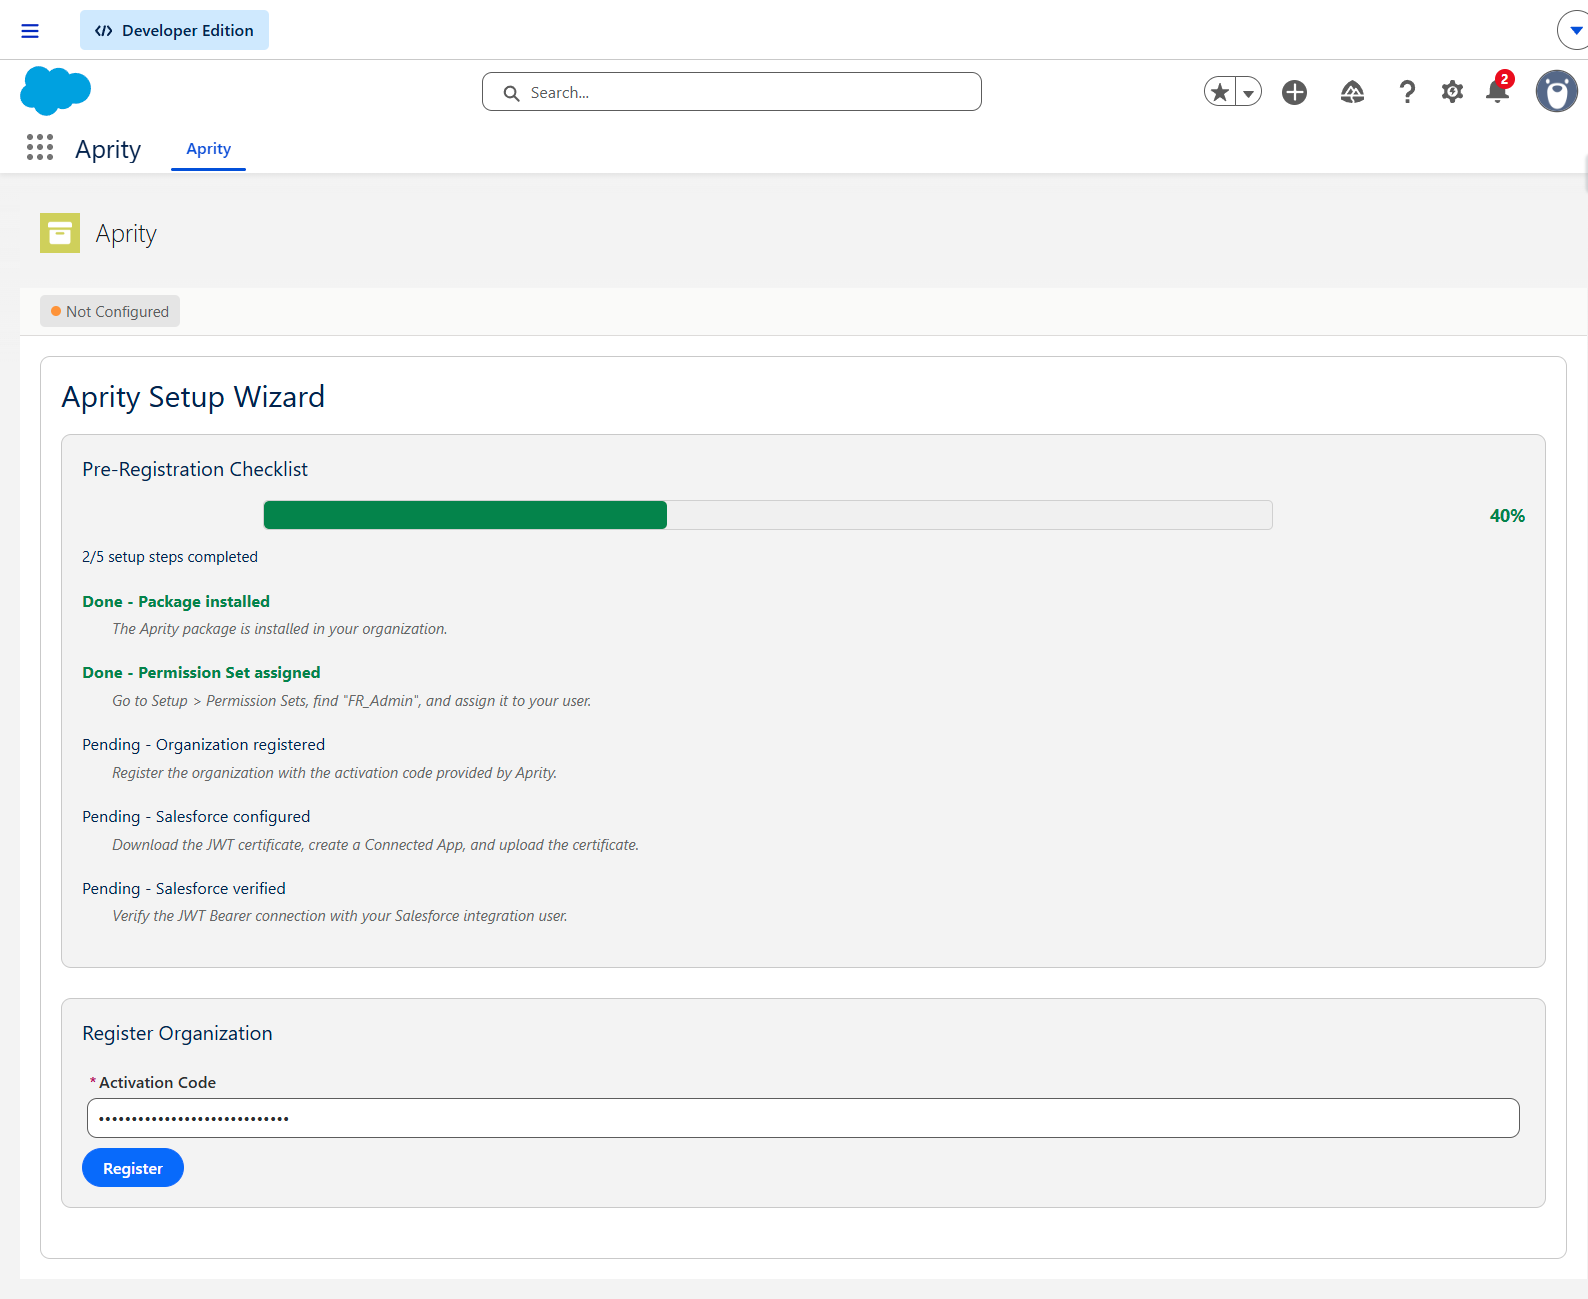
Step 3: Register your organization
- Open the Aprity app from the App Launcher.
- The Setup Wizard appears with a pre-registration checklist.
- Enter the activation code provided by aprity.
- Click Register.
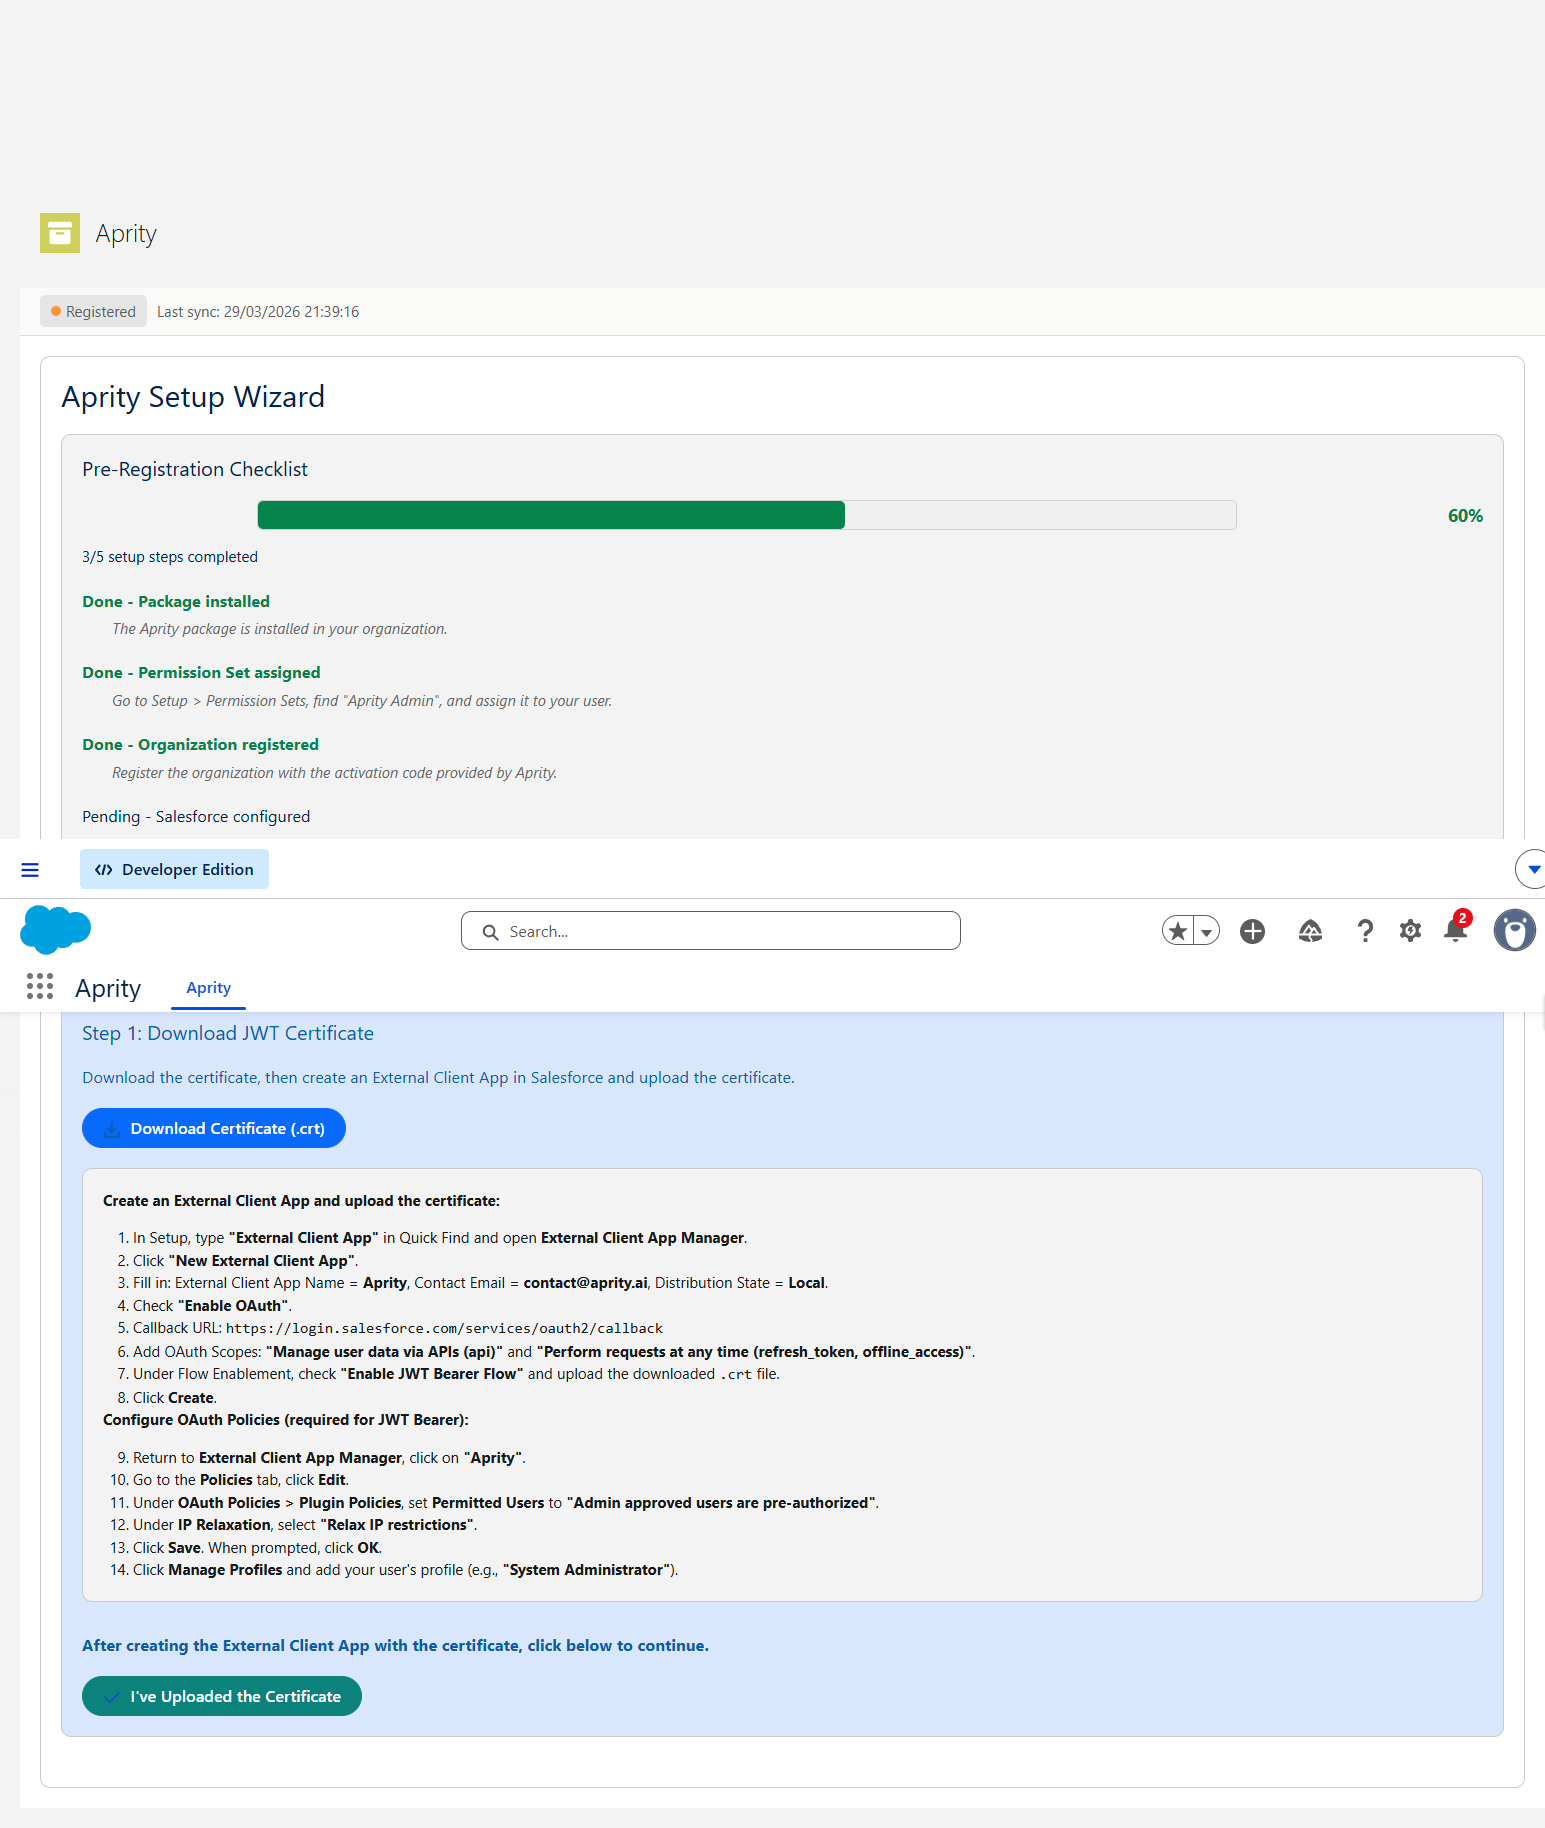
Step 4: Create an External Client App
4.1 Download the certificate
In the aprity Setup Wizard, click "Download Certificate (.crt)" to save the aprity JWT certificate to your computer.
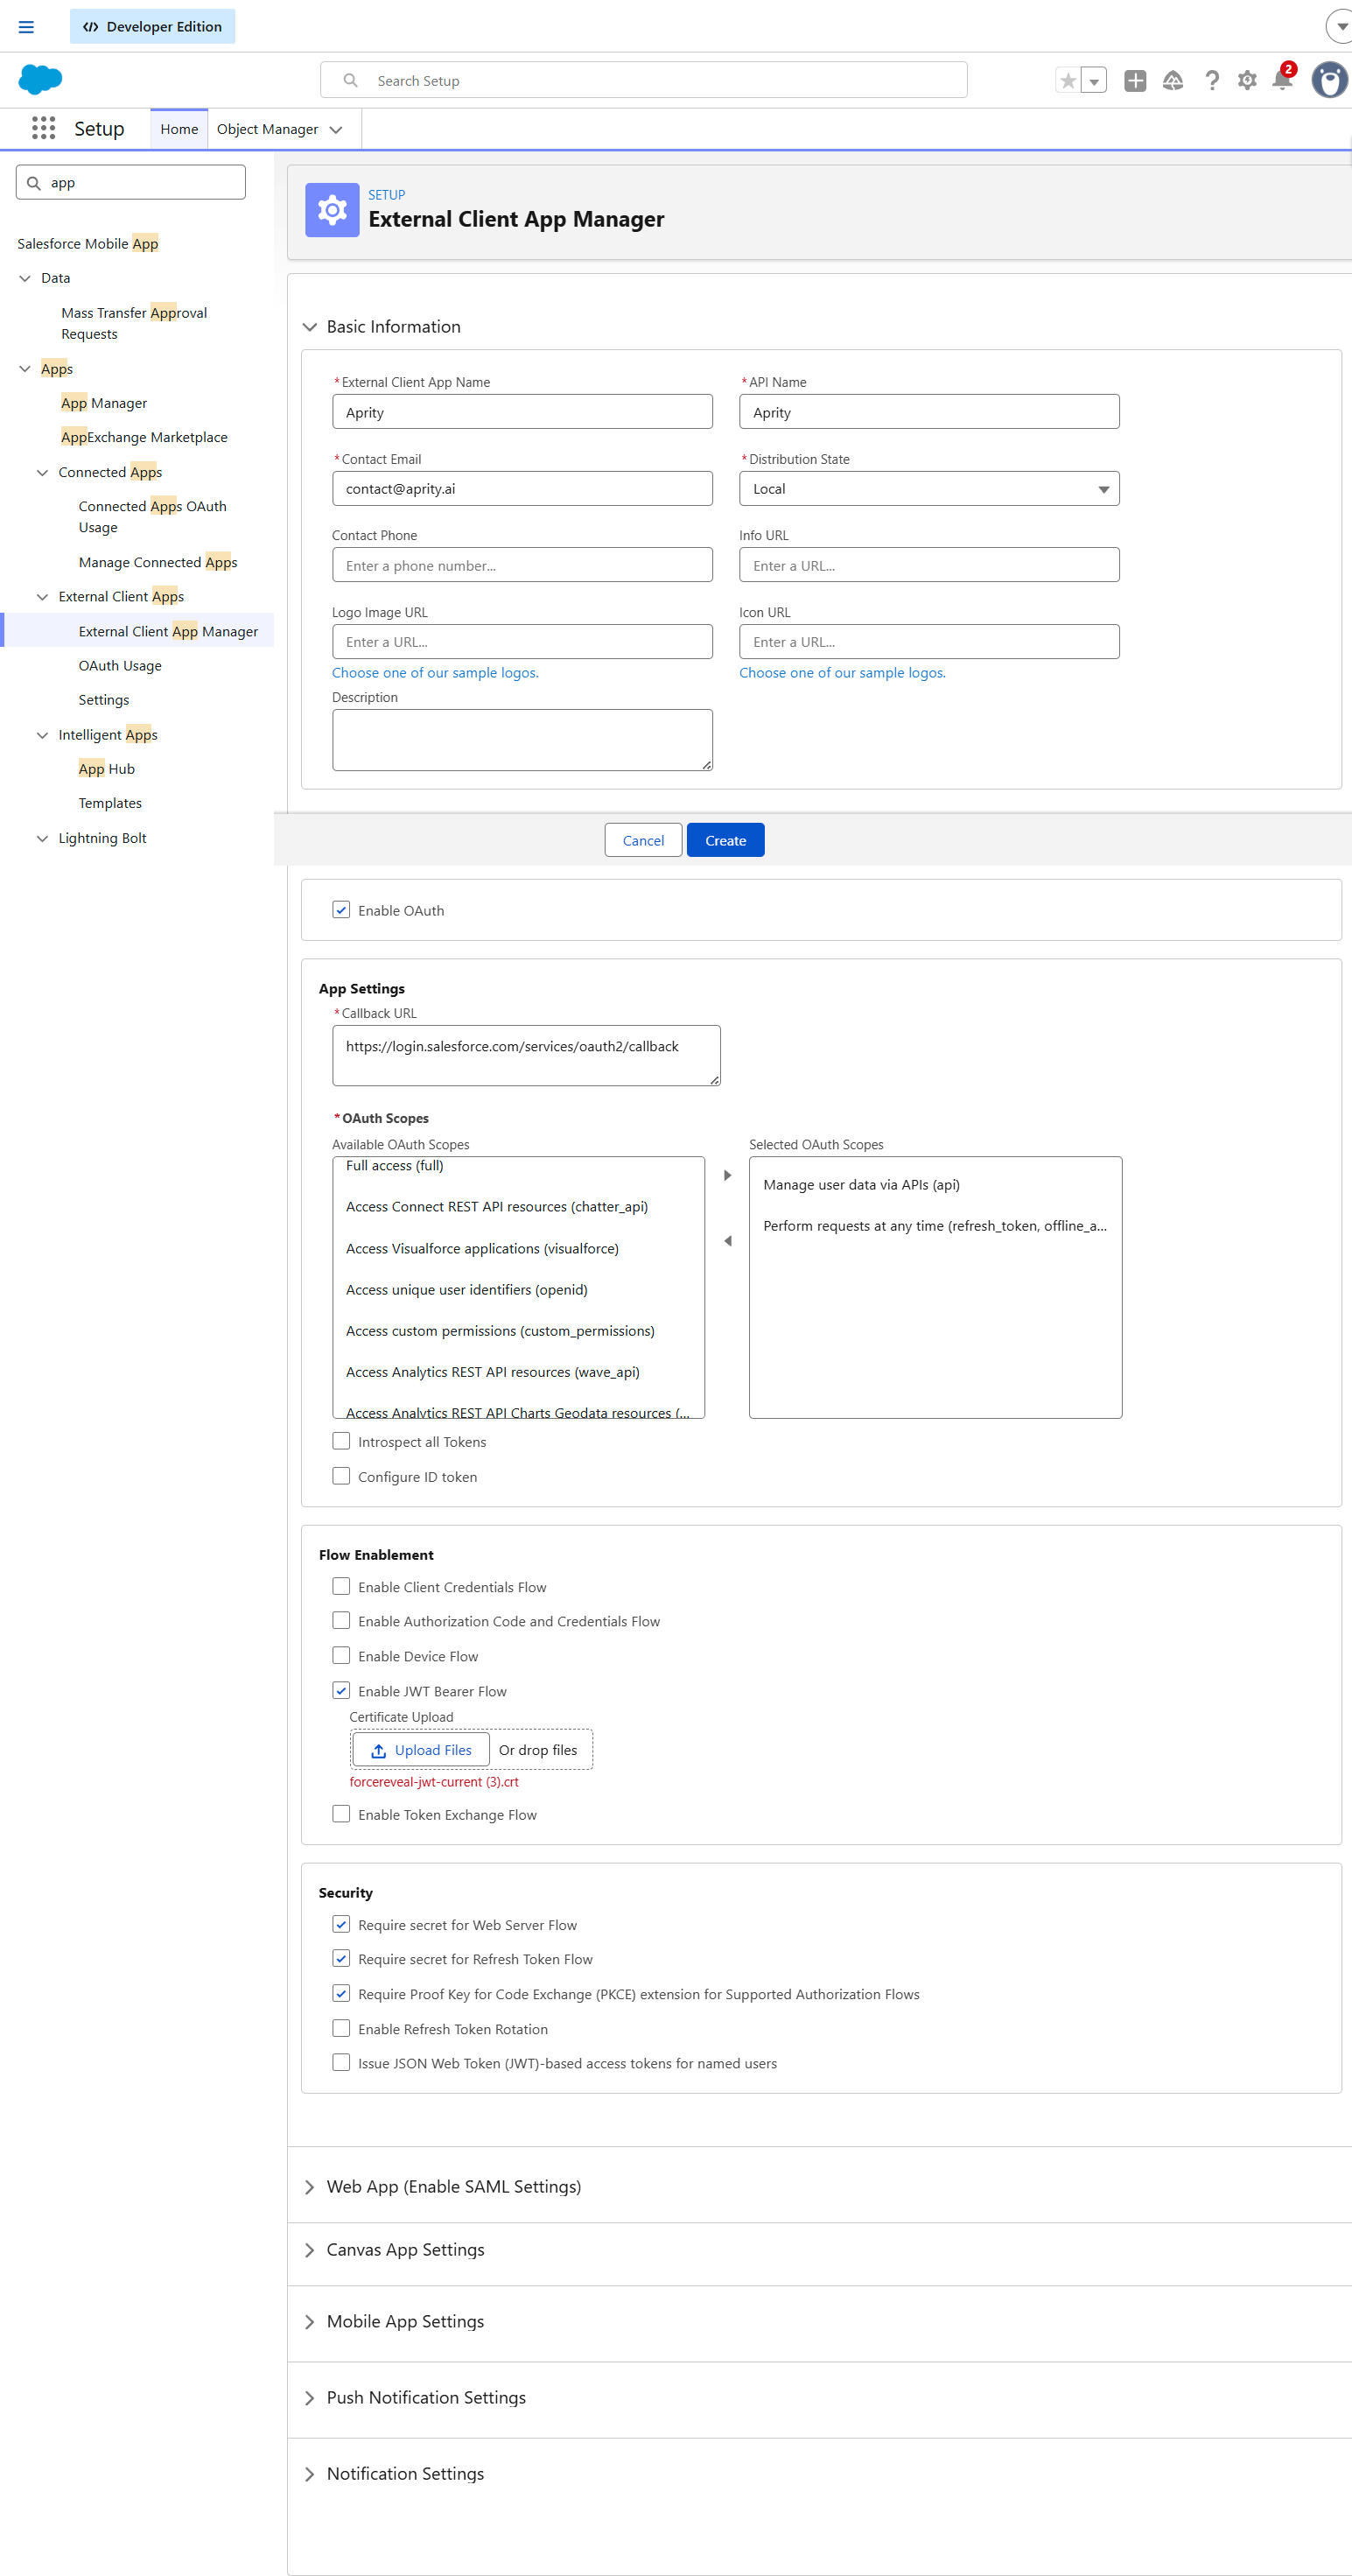
4.2 Create the app
- In Salesforce Setup, type "External Client App" in Quick Find and open External Client App Manager.
- Click "New External Client App".
- Fill in:
- External Client App Name:
Aprity - Contact Email:
contact@aprity.ai - Distribution State:
Local
- External Client App Name:
- Check "Enable OAuth".
- Set the Callback URL to:
https://login.salesforce.com/services/oauth2/callback
- Add the following OAuth Scopes:
- Manage user data via APIs (api)
- Perform requests at any time (refresh_token, offline_access)
- Under Flow Enablement, check "Enable JWT Bearer Flow" and upload the
.crtfile you downloaded in step 4.1. - Click Create.
Step 5: Configure OAuth Policies
Required: These settings are mandatory for JWT Bearer authentication. Without them, verification will fail.
- Return to External Client App Manager and click on "Aprity".
- Go to the Policies tab, then click Edit.
- Under OAuth Policies > Plugin Policies, set Permitted Users to "Admin approved users are pre-authorized".
- Under IP Relaxation, select "Relax IP restrictions".
- Click Save. When prompted, click OK.
- Click Manage Profiles and add the profile of the integration user (e.g., "System Administrator").
- Click Save.
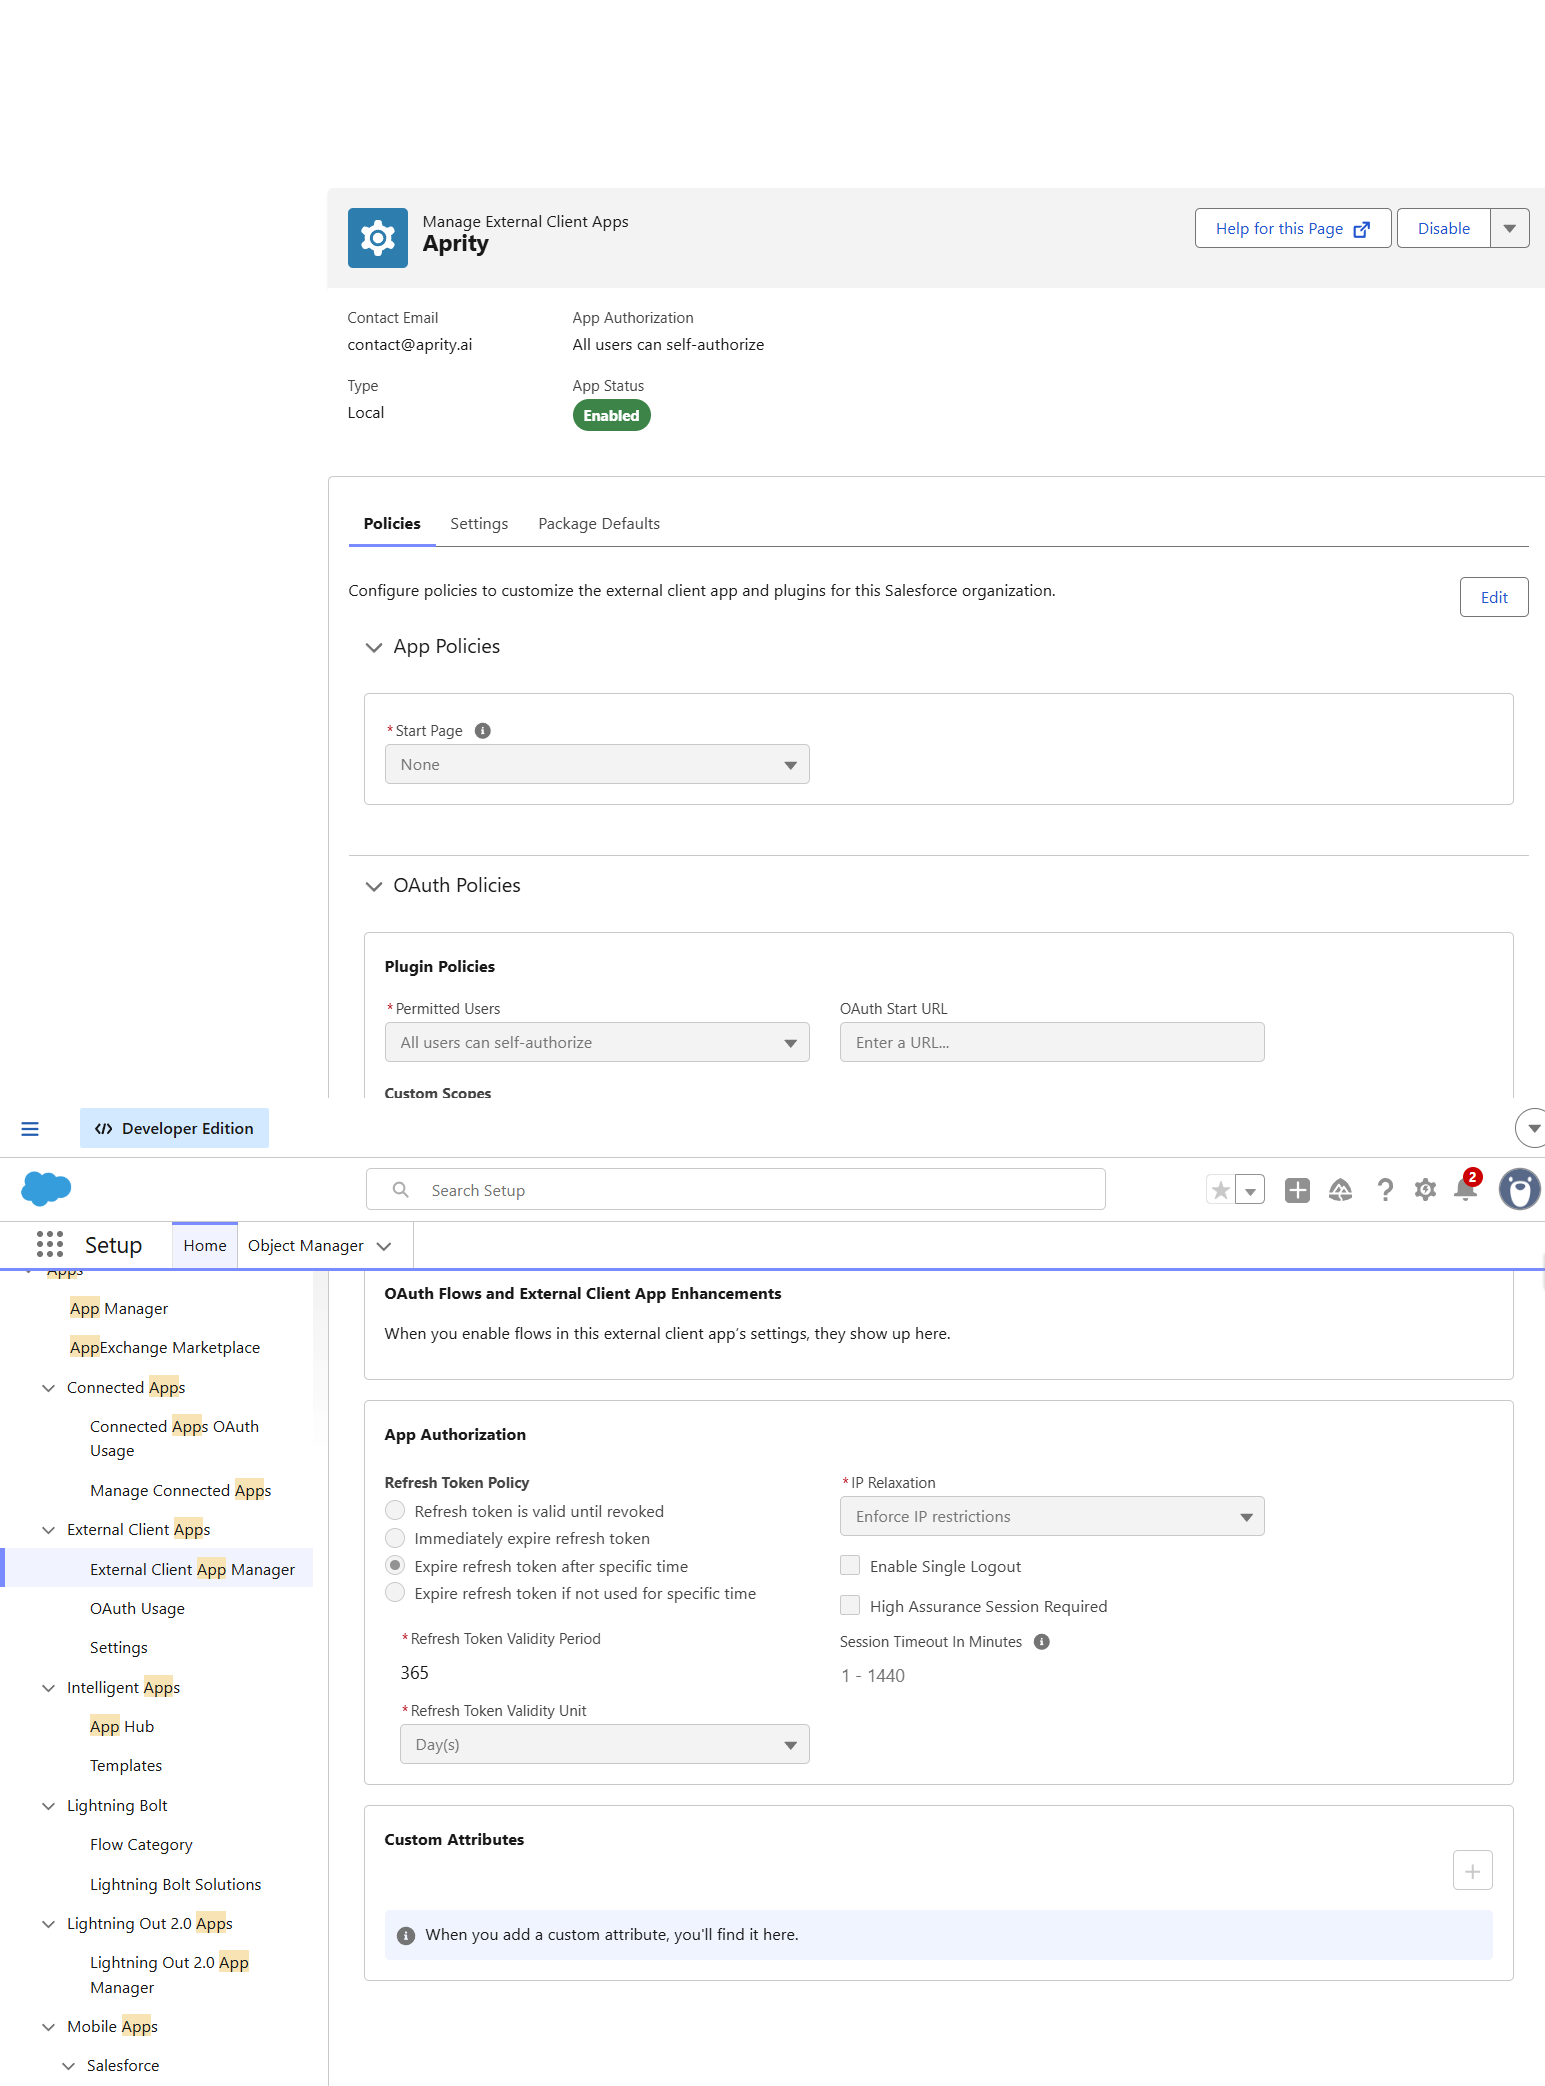
Important: The integration user's profile must be added via Manage Profiles. This authorizes the aprity backend to authenticate via JWT Bearer on behalf of this user. Without this step, verification will fail with "user hasn't approved this consumer".
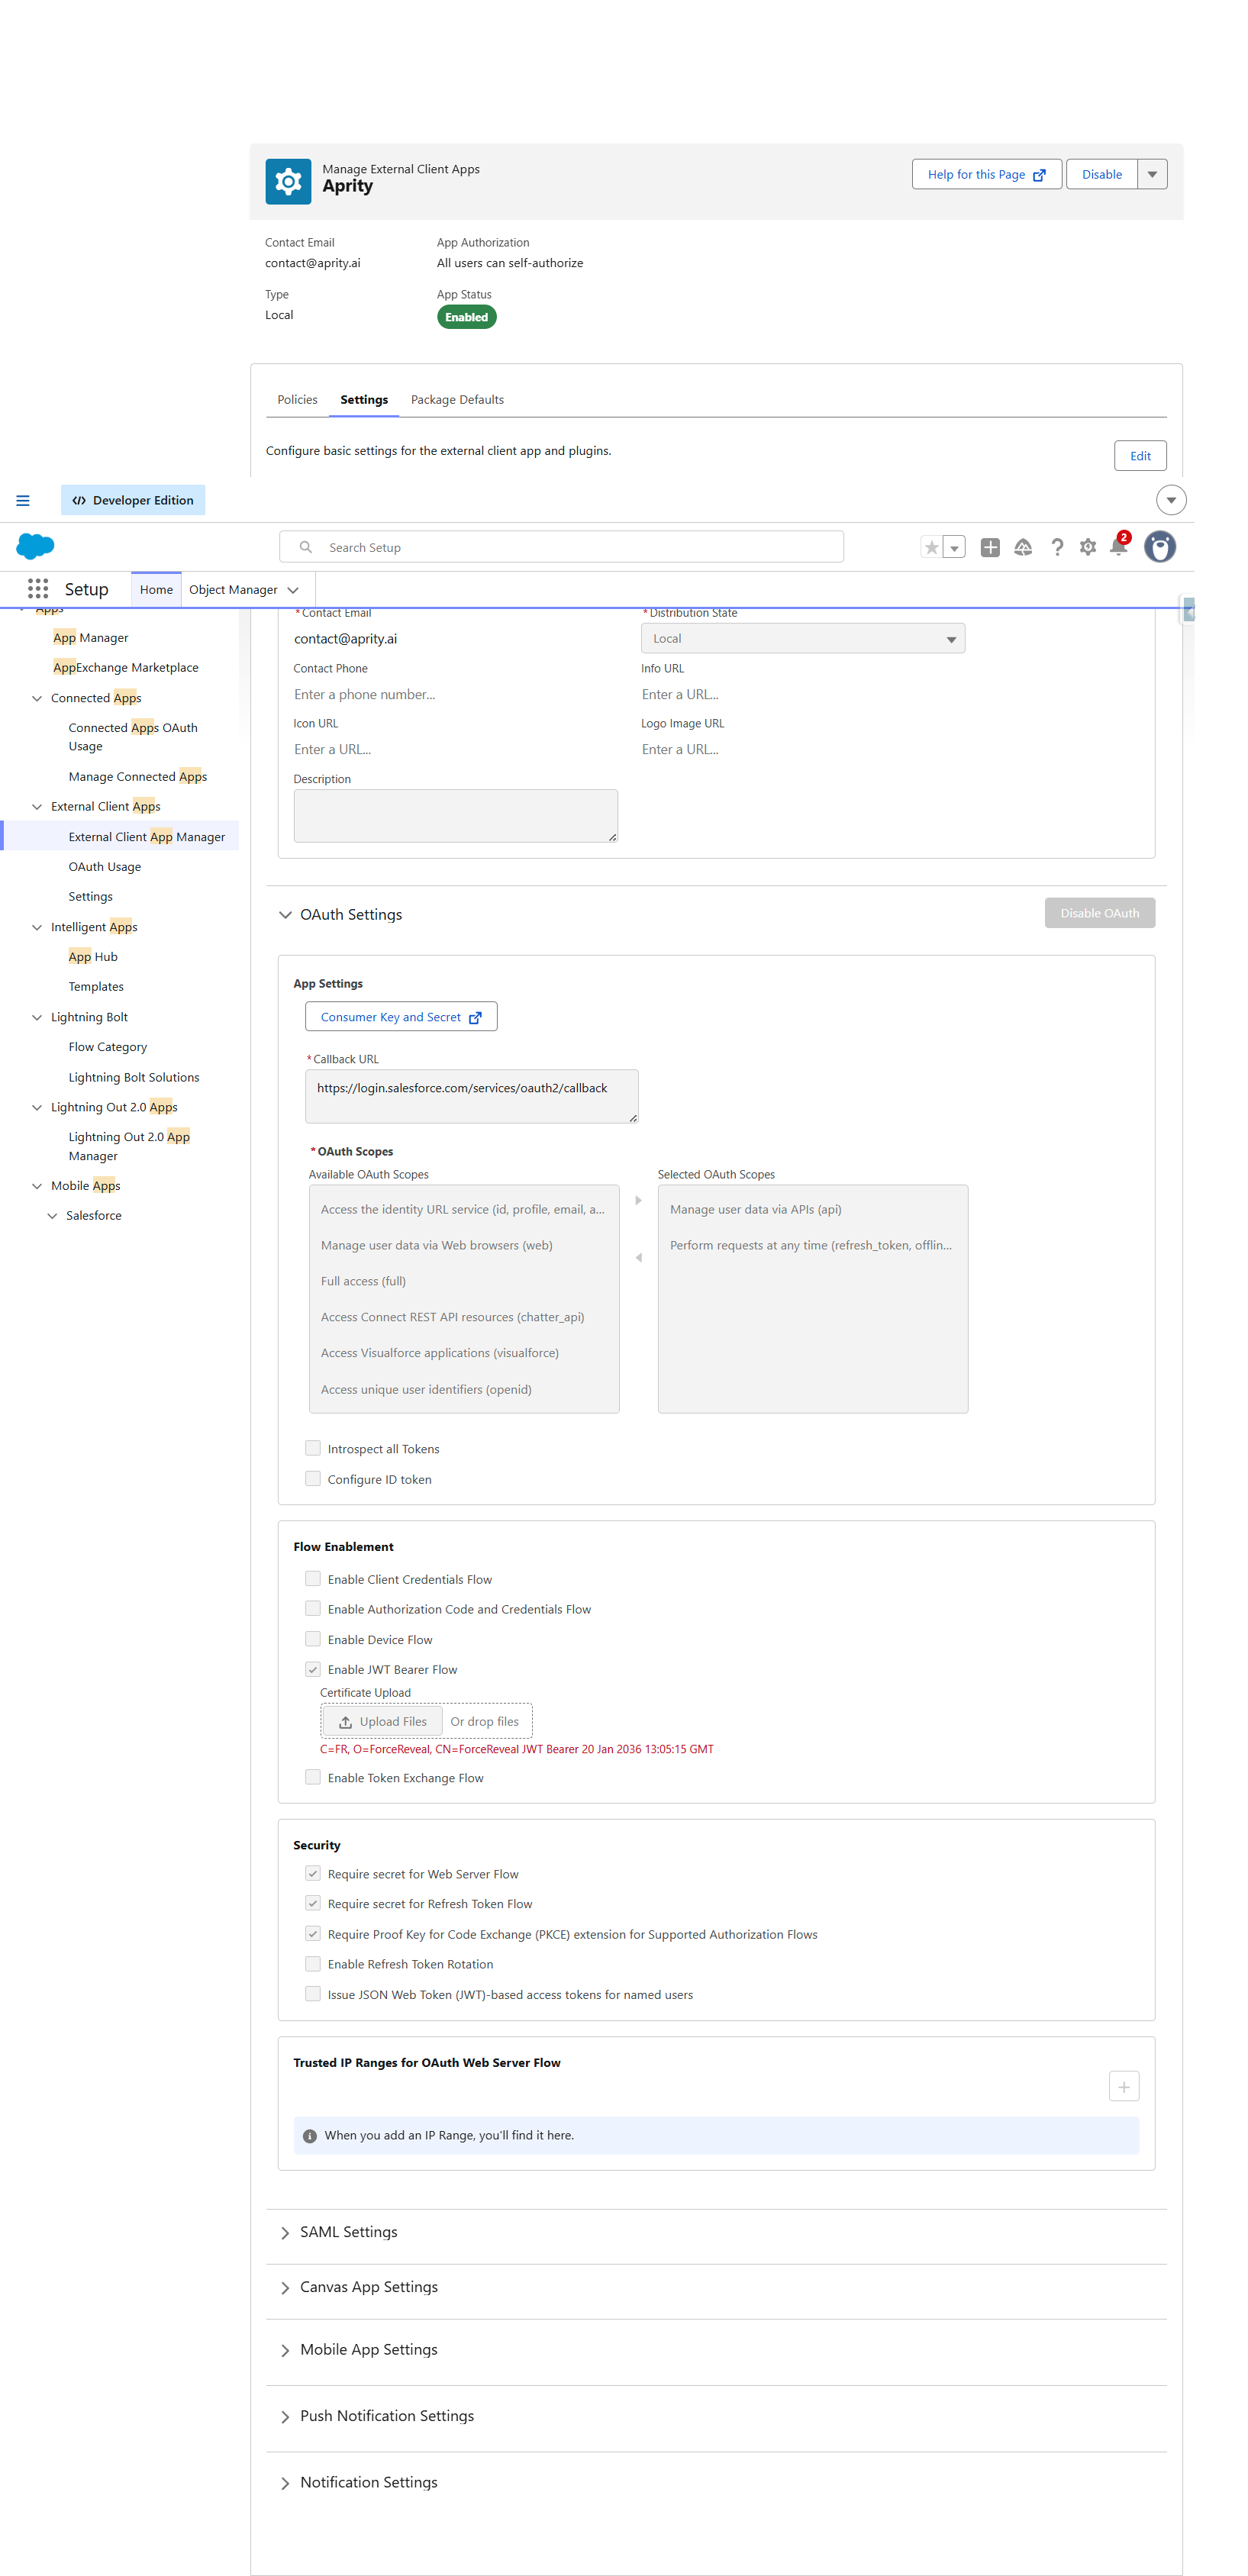
Step 6: Copy the Consumer Key
- In Salesforce Setup, open External Client App Manager.
- Click on the "Aprity" app.
- Go to the Settings tab.
- In the OAuth Settings > App Settings section, click the "Consumer Key and Secret" button.
- Salesforce will ask you to verify your identity via email -- enter the verification code sent to your email.
- Copy the Consumer Key value.
- Return to the aprity app and paste it in the Consumer Key field.
Step 7: Configure and verify
- Enter the Salesforce Username of the integration user (e.g.,
admin@yourcompany.com). This is the username shown in Setup > Users. - The login URL is auto-detected. If auto-detection fails, you will be prompted to enter your My Domain URL manually.
- Click "Configure & Verify".
Success: When verification succeeds, you will see a green banner with your Salesforce instance URL. All setup steps should show as completed.
You are all set! Navigate to the Configuration tab to start your first metadata analysis. See Running Your First Scan for next steps.